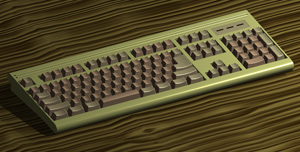
5-2 : Combining RenderingsIntroduction Working with different Visual Styles This is what we're shooting for in this tutorial. Click on the image below to see the full size image.
The above image combines four different visual styles from AutoCAD: Wireframe, Hidden Wireframe, Conceptual and Rendered. The styles are visible in that order from left to right. If you don't already have a 3D model to open in AutoCAD, you can use this one. If you don't have AutoCAD, but want to follow along - here is the Photoshop file with the layers needed. Using Masks Below are the layers used in this image:
In the Photoshop file, I have these as separate layers. From here the process will work the same no matter which files you are using. As an option, you can clear the background around the wireframe and conceptual layers to get the effect in the top image. Here are the layers:
What I've done is added a Layer Mask to each layer (outlined on the layer). I did this with the "Add Vector Mask" icon that is outlined on the bottom. Note that on the "Render" layer, the mask is active or highlighted. Any adjustment I do now have to have the mask active. This allows me to change the layer, but not change the content of the layer image. If I screw up, I can drag the mask the to the "Trash Can" (bottom right) and the layer reverts back to its original state.
Start with the top layer. Make the "Wire" layer the current layer and make the mask active. To make the fade effect, we are going to use the Gradient tool. Select the tool and then find the black to white gradient at the top.
Using this setting will give a smooth fade that we need for this effect. Now that you have everything set, click and drag the gradient tool across the image along the length of the keyboard. If you go from left to right or right to left, it doesn't matter - just remember to use the same direction on the rest of the layers. If you do this multiple times on the same mask, the effect accumulates, if you end up with an undesirable effect then you can delete the content of the mask and start over. After dragging across the screen, you should see that some of the wireframe is removed to reveal the hidden wireframe underneath. Repeat the process for the "Wire Hidden" and "Conceptual" layers - while starting a little closer to center than the layer before. If you don't like the effect, you can undo and try again. This will take a few tries to get it just the way you want. If you want to start over, delete the mask, make a new one and try again. Once you get it just the way you want it, try to add a green light above the number pad using the marquee tool and fill as shown in the sample.
Conclusion Reference |
|||||||||||||||||
<< Previous Tutorial |
Return to List |
Next Tutorial >> |
|||||||||||||||


Owned and operated by The Art Department, Chester, NE |
Last Update: |