5-1 : Seamless Textures for your RenderingsIntroductionThis level of tutorials will apply to a smaller segment of Photoshop users, but I feel that as software evolves, the lines blur between different programs. I've been using AutoCAD longer than I have Photoshop, and find that there are times when I use the two programs side-by-side. This section will show some of the techniques you can use in Photoshop to make your CAD and 3D work better. In recent versions of Photoshop, Adobe has added 3D functionality. We'll review this and show how CAD and 3D can make your Photoshop better, and visa-versa. This tutorial will also show you how to make images that you can use as seamless or repeating textures in your 3D programs.
Seamless Textures
Note that you can see a hard edge at the midpoint (both vertical and horizontal) - now imagine this repeated 100 times in a large rendering.
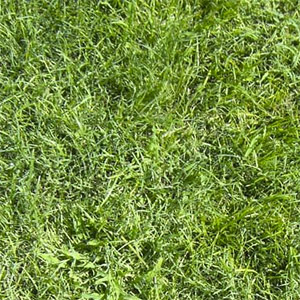
Here is a grass texture based on the one above - only this time it was transformed into a seamless texture first.
Wow! No seams! What a difference! This difference will make a huge improvement in your renderings. Imagine how you can use this for brick fireplaces, stucco walls, roof tiles and more. Below are the two image that were used to create the patterns above. They look almost identical, don't they?
Creating a Seamless Texture We'll start with this image of a standard, rough stucco texture.
I find that smaller image sizes work best with this tool. Right-click on the image above and select "Copy Image". Start a new image in Photoshop and paste the copied image. Now comes the easy part. Select the entire image (CTRL+A). Now navigate to Filter > Pattern Maker.
You'll see this dialog box open:
Press the Generate button and you see that the stucco gets 'scrambled' into a new pattern. You'll also see that you can "Generate Again" to try different patterns. When you have one that you are happy with, press OK. Wasn't that easy? You can now use your new texture in AutoCAD or another program. To see how to use custom textures in AutoCAD, check out this tutorial that I wrote.
Keep in mind that many textures created this way will have a repeating pattern of some degree. Try to keep an eye on this when are you generating your pattern.
Creating a Seamless Texture Using the Offset Filter. Use the same stucco image from above. Start with it in a new file. Navigate to Filter > Other > Offset.
Now you'll see a dialog box come up. What you need to set is the offset (in pixels) for the Horizontal and Vertical. I usually set this to 1/2 the width of the image - in this case, +200. Pick the Wrap Around radio button.
This will leave with an image that is seamless on the edges, but could have edges in the middle now.
It isn't really much better for our uses, but at least the edges are working in our favor. What we can do now is use the clone tool or healing brush to remove the hard lines in the image. With a few moves, I now have a useful texture.
Conclusion Reference |
|||||||||||||
<< Previous Tutorial |
Return to List |
Next Tutorial >> |
|||||||||||


Owned and operated by The Art Department, Chester, NE |
Last Update: |