3-2 : Correcting Image ExposureIntro Unlike the first level of tutorials when you learned about the toolbar, this level will use a drop menu. Find the menu shown below - you'll be using it a lot. I will use the notation of "Image > Adjustments > sample" to guide you to the tool. That means that you look for the Image menu at the top of the screen, click it, then look for Adjustments in that menu, and navigate to the required tool. There is a video at the bottom of the page to show more about these concepts.
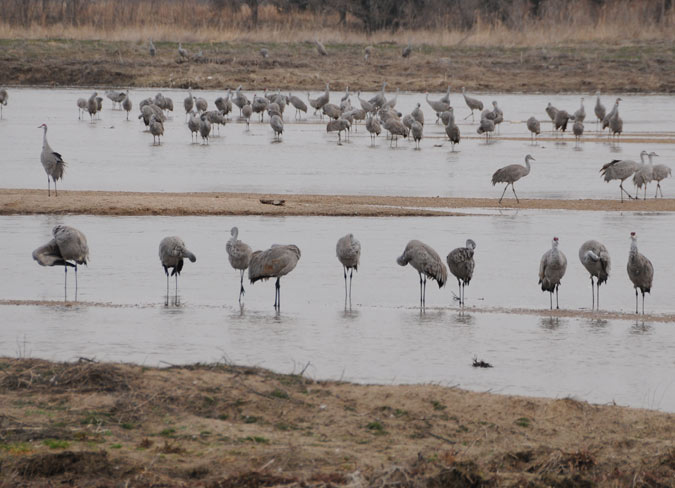
Below is a photo of some Sandhill Cranes taken during their migration stop in Nebraska. I had very little light to work with in the morning, and this is a typical shot of what I ended up with.
Yes, you can see the birds, but I won't selling this one to National Geographic, it's way too dull. Download the image here to use in the tutorial. Or right-click the image above and 'Copy and Paste it into Photoshop" by starting a new file after copying the image and then type CTRL+V. Or use one of your own images.
Auto Levels Under exposed images like this can fixed quickly by using Auto Levels. Older versions of Photoshop will have "Auto Levels" in the main section of the Image menu. For CS4, you need to go to the Image > Adjustment > Levels and you will see this window appear.
Ignore the rest of the window for now (you'll look at it soon).You'll see that Photoshop will do it's best to correct it and give you an example like the right side of the image below.
That's really all there is to Auto Levels. If you have some digital images on your computer, open them up and see what effect the Auto Levels tool has on them. If you don't have any images, you can do a google search for badly exposed images and use some of them to practice on. Brightness & Contrast Below is the crane image adjusted using Brightness and Contrast (I selected half to show the difference):
You'll notice that I have made mine a little darker than Photoshop did using Auto Levels. In this case, I thought that the water was a little washed out previously. I lightened the image as much as I could without making the water too bright. It's a fine line, but at least now the detail in the birds is still visible and the water isn't too bright. Once again, open some poorly exposed images and try to correct them with Brightness and Contrast. You'll see that this method is also quick and easy while just requiring a steady hand to move the slider in small increments (or you can type in the value) and a good eye for what you like in a photo- "No experience necessary."
Levels Have a look at the image below - it shows the corrected area, as well as the Levels dialog box.
What you'll first see is an outline of the Loch Ness Monster. That shape is actually called a Histogram and it graphically displays the exposure range in your image (or selected area). Below the Histogram are 3 sliders. The black one on the left is the shadows slider. The center one is for midtones, and the white slider is used to control highlights. How you adjust these is entirely up to the user, but here are some quick points. Move the black (shadows) slider to where the bottom left of the histogram reaches the lowest point. This method will work on most photos. The black slider allows you to shorten the histogram to the point where the darkest area ( bottom left) will become black in the image. This is desirable, unless you know the darkest area is not actually black. Moving the highlight slider to the left allows you to make the lightest area white (depending upon color cast). The middle slider is needed to create a fine touch on the midtones. Slide it back and forth to see its effects. If you compare the image adjusted with Levels against the others, you'll notice that it has more contrast and 'depth'. Adjusting Levels varies from image to image. Some will have more dark areas, some will have more light areas. Using the simple steps above will work on a vast majority of images. Curves
You'll notice that I have a high contrast image with stronger colors, I feel that it shows the birds off against the water. Once again, your results may vary. Using Curves
Your image won't have the 3 small boxes in the histogram. I have added them to show you how I start when using Curves. These boxes allow me to control the curve with 3 different grips. I use one for the shadows, one for the highlights and one for the midtones. Many images will be improved by creating what is called an "S-Curve". Below is the S-Curve I used for the Crane image.
In this example, I took the darker areas (left side) and dropped them down - this gives me fuller dark tones. I took the light areas and raised them up - this lightens the highlights. I also moved the bottom highlight slider to left. Then the Midtones are adjusted to finish the correction (make sure to check the Preview box under options, to see what changes you are making to the image.). Shadow/Highlight
By default, the Shadows > Amount slider will move to 50 - in this example (since it's already dark), you can move it the left to make the shadows darker.. You want to adjust the Highlights > Amount slider to the right and darken the highlights. Then give the Adjustment > Midtone Contrast a little boost to the right if needed. For each area you can select the Amount (how much effect), the Tonal Width (how much variance between light and dark) and Radius (area around each pixel that is used to determine if the pixel is in shadows or highlights). Color Correction and Midtone Contrast are self explanatory. Black Clip can be set higher to remove detail in the shadows and White Clip can be set higher to remove details in the highlights. When you first apply this tool, Photoshop will set some default values. Use these as a starting point to get the image you want. You can set them in any order, but try different combinations before settling on a final image - you'll be surprised how much you can change your image. Below is the Crane image after being adjusted with this tool.
Combining Corrections Below is a final version. I have combined the methods above and used a couple of other corrections that will be shown in later tutorials.
Setting Exposure with Pickers
This image works because there are distinct areas that I can consider black and white. Open the Levels dialog and look for the eyedroppers. You'll see three - black, gray and white.
Pick the white eyedropper and select the brightest area in the white part of the flower. Take the black eyedropper and select the darkest area in the background. The gray eyedropper won't be used here, but it is great for color correction (later tutorial). Below is the image that has been corrected just by selecting these two points.
Conclusion Reference |
|||||
<< Previous Tutorial |
Return to List |
Next Tutorial >> |
|||


Owned and operated by The Art Department, Chester, NE |
Last Update: |